Download the required files:

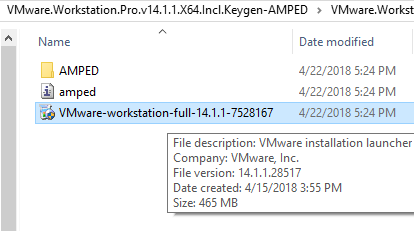
Step 2:
Extract VMware Workstation Pro

Step 3:
Open the extracted folder and run the installer file for VMware Workstation Pro
Step 4:
complete the installation. afterwards click "finish".

Step 5:
Go back to the VMware unlocker .zip file and extract the contents.

Step 6:
Open the VMware unlocker folder and run the win-install.cmd file as an admin by right-clicking.

step 7:
Let the cmd prompt do it's thing when it pops up

step 8:
open the vmware installer folder and navigate into the "AMPED" folder to find the keygen for vmware. run the keygen.exe file. you may need to disable antivirus or windows defender to run this program. if the file is not in the AMPED folder then it was automatically deleted by your security program.

step 9: open the installed VMware program and copy the generated serial number into the license key field in VMware.

step 10: in VMware, create a new virtual machine.

step 11: select "custom"

step 12: select "workstation 14.x"

step 13: select 'i will install OS later'

step 14: select OSX and 10.13

step 15: select a name for the new virtual machine. the default is fine.

step 16: select how much processor power you would like to grant to the virtual machine. this can be changed later if you want... using less process will make virtual machine run slower but will make your actual computer a bit smoother. an error message will display if your computer can not handle the selected settings.

step 17: select how much RAM to allot to the VM (virtual machine). 4096 is a good number if your PC can handle it.

step18: select 'use NAT'

step 19: use recommended setting for this i/o controller options.

step 20: select SATA drive type

step 21: create a new virtual disk.

step 22: set disk size as close to 40gb as possible. store as single file and allocate space now.

step 23: name disk and select if you would like to install it in a custom location.

step 24: click 'finish' to create the new disk.

step 25: click 'cd/dvd sata' in the VM devices list.

step 26: browse to the 'MacOSHighSierra10.13.4.iso' file that we downloaded before starting the tutorial.

step 27: in the processor settings, check the top 2 boxes, leave 3rd box unchecked.

step 28: click "ok" to save the settings. Close VMware workstation.
step
29: Navigate to where you installed the .vmx disk. this was that file
that we alloted 40 gb for. by default it is in documents>virtual
machines>mac os 10.13. Open 'notepad' and drag the .vmx file into
notepad.

step 30: at the bottom of the file that we are editing in notepad, add the line: smc.version = "0"
save the file and close notepad.

step
31: open VMware and click the green play button to start the new
virtual machine. OSX will begin installing in the new machine. wait for
the 'language select' prompt which will come up after installation is
complete. this process will take some time. go get a drink or something.

IF YOU GET AN ERROR ABOUT INTEL/AMD VIRTUALIZATION:
(may look like this if your bios can support)

look up how to go into your computer's BIOS and enable the virtualization.
OR:
go back to step 27 and uncheck: "virtualize intel vt x/EPT or AMD-V/RVI"".
OR:
IF YOU STILL GET an ERROR:
go back to what we did in step 30 and also add this to a new line at the end of the config file using notepad:
monitor.allowLegacyCPU = "true"
step 32. select 'english' when prompted. on the next sceen select and run 'disk utility'

step
33: in disk utility, select 'vmware virtual sata drive' in right list,
click 'erase' in top panel, enter name and settings as shown, and
finally click 'erase' button.

step 34: close disk utility and select 'install macOS"

step 35: agree to liscense and select to install macOS on the newly created OSX drive.

VM
system will restart when complete. OSX VM is now set up. First-run
preferences setup guide will run when installation is finished.
Step 36: Geting VM to recognize USB devices:
Some
usb devices like ipod and iphone might not be recognized by the vm,
mine never are at first. to fix this, go into USB settings and select
"usb 2.0" mode. also check all 3 boxes.

Step
36.5: open itunes in the VM to verify ipod is connected. if not, try
unplugging your ios device and plugging in again. usually I just wait a
minute while the item is repeatedly connected and disconnected
automatically by windows. after a few dings it shows up in vmware. make
sure in ur vm settings that the external devices are set to
auto-connect. if you followed the guide, we set this in step 36.
OPTIONAL STEP (recommended):
after
you get everything set up, you can go into the cd/dvd settings and
eject the disk image. after ejecting the image, you can go into
"VM>imstall vmware tools" (while vm is running) and a new image will
load into the VM. install this software to enhance your vm experience.
the graphics software will be dramatically improved and you will be able
to get a nice full screen experience.


